
The Backtest page lets you ask the question, "If I'd been running these settings on every past alert, how would I have done?" It replays historical alerts against the rules you pick and tells you the result.
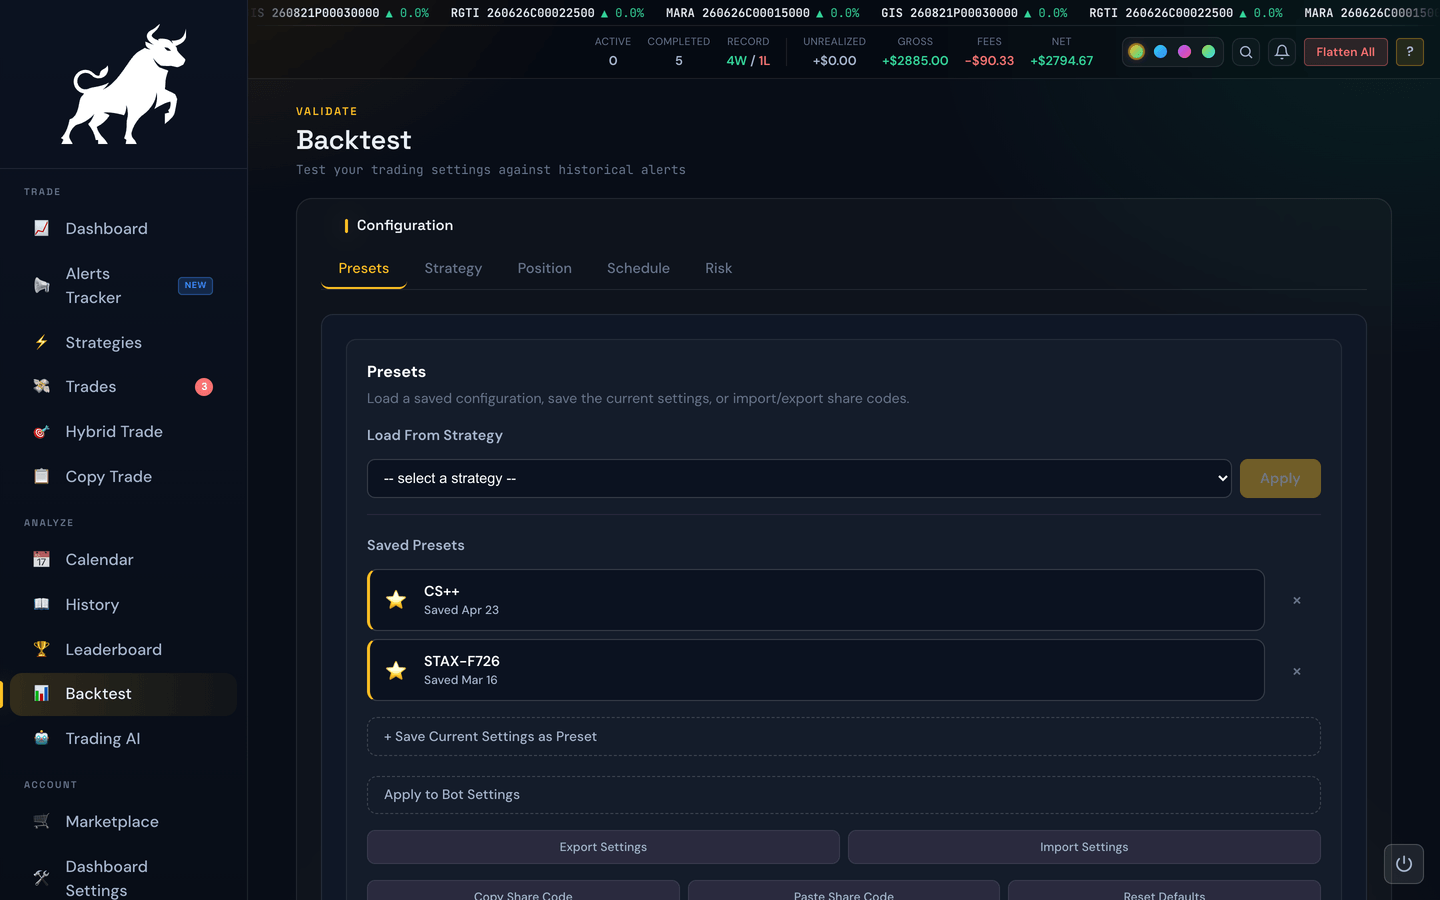
The configuration is split across five tabs — Presets, Strategy, Position, Schedule, and Risk. The sections below walk through each tab so you know exactly what every control does. When you're happy with a setup, Run Backtest replays it and shows the results.
Tip
Backtest mirrors your live trading settings, so most controls here have a matching live-trading help topic (linked as you go). The backtest just lets you try them against history before you risk a dollar.
Presets tab
This is the tab you land on. It's mission control for loading, saving, and sharing whole configurations.
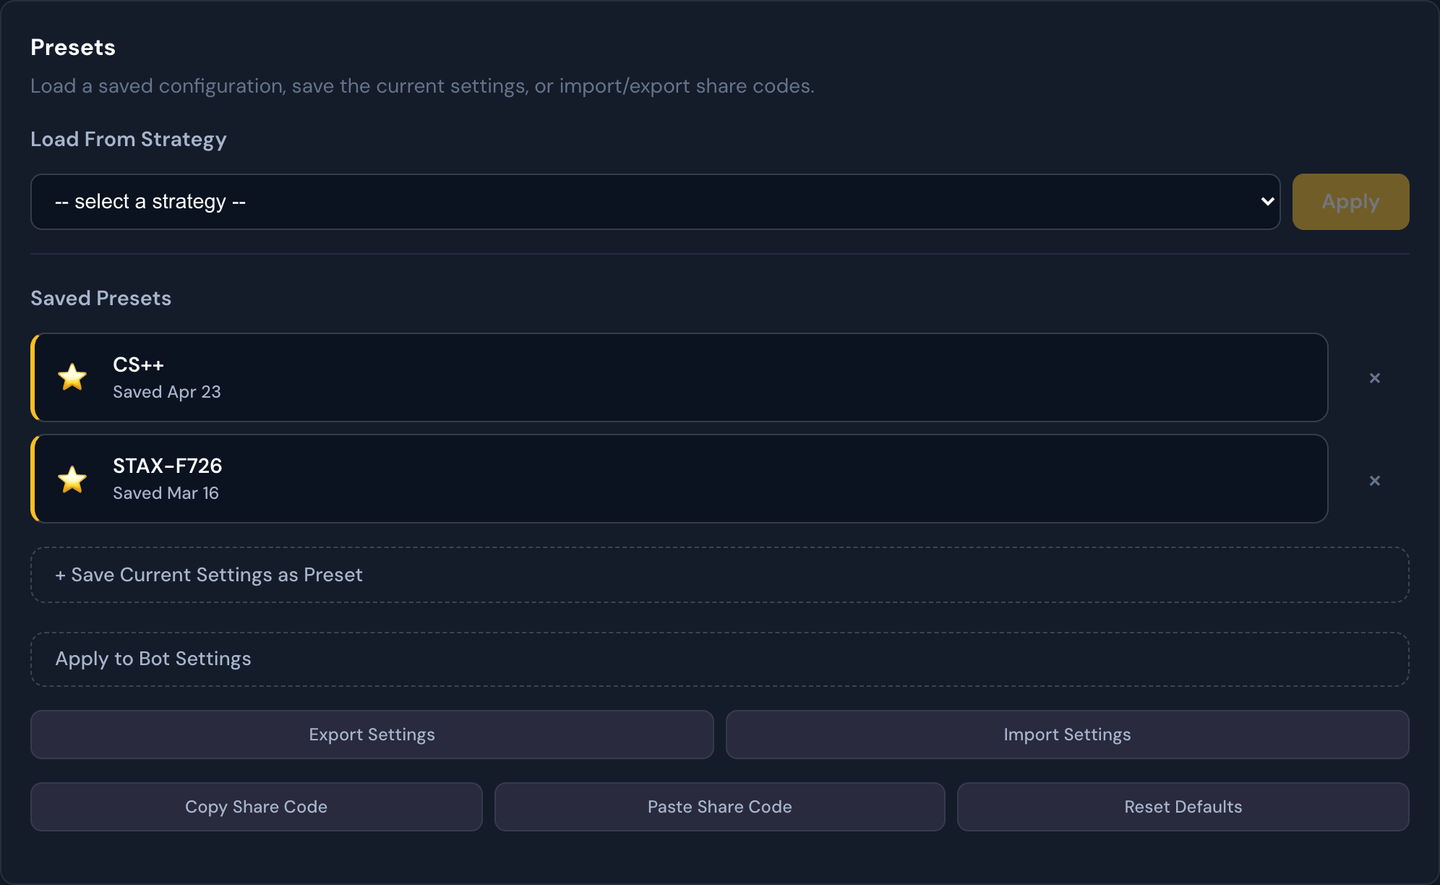
- Load from Strategy — pick one of your live strategies and click Apply to pull its exact rules into the backtest. Great for asking, "How would my current live setup have performed last month?"
- Save / load / delete presets — keep a named list of setups you've tested, and prune the ones you no longer want.
- Share codes — Copy Share Code turns the current setup into a short string you can paste elsewhere (or send to a friend); Paste Share Code loads one back in. Share codes carry the rules only — no historical results or alerts travel with them.
- Apply to Bot Settings — once you find a setup you like, this copies it onto your live strategy (covered in detail at the bottom of this page).
Strategy tab
The Strategy tab is where you choose what to trade and how to exit.
Symbol filters
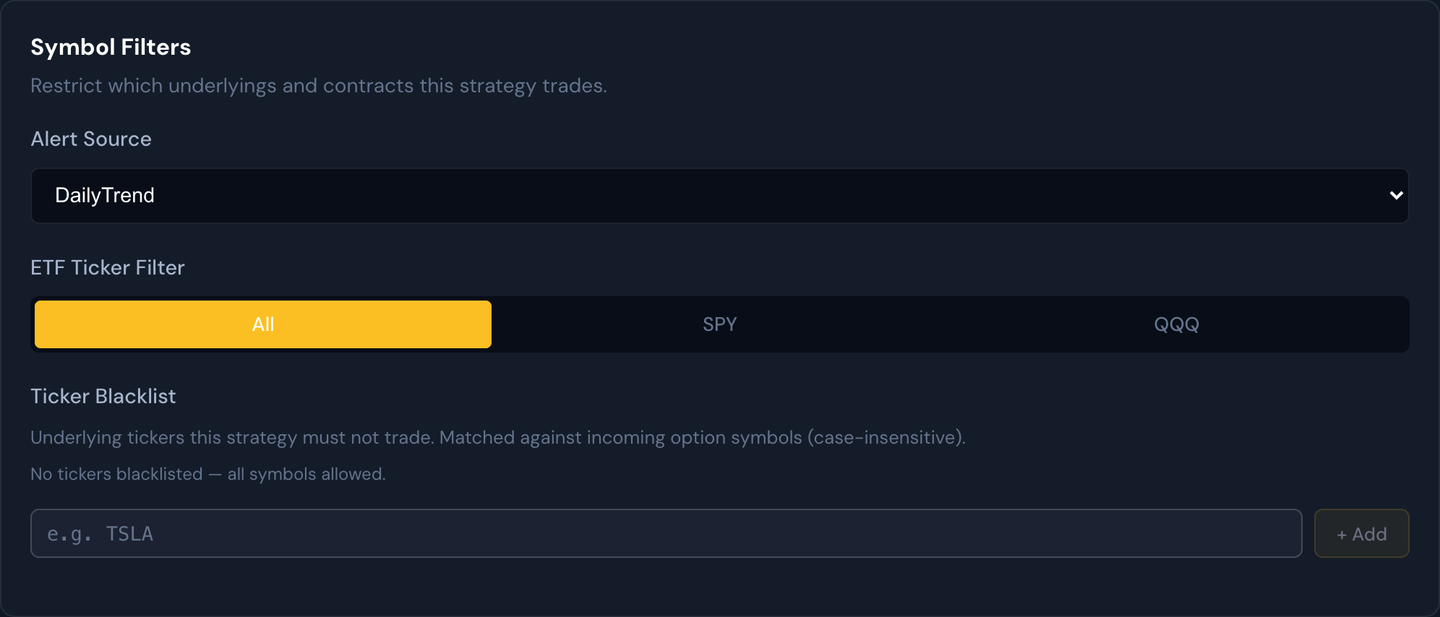
- Alert Source — which stream of alerts to replay (e.g. OG, DailyTrend, or a Signal Hub strategy). See Signal Sources. Sources that publish their own exits — like Copy Trade Stax and Dope Spreads — appear here labeled "(Entry Only)", because a backtest is always entry-only: it takes the entry and applies your exit rules below. It can't replay a source's live exits or averaging, so there's no "full copy" mode to backtest.
- ETF Ticker Filter — restrict to All, SPY, or QQQ only.
- Ticker Blacklist — underlyings the backtest must never trade. An alert is skipped if its symbol contains any entry you list (case-insensitive).
Example
Set the ticker blacklist to
TSLAand the backtest pretends every Tesla alert never happened — handy for checking how much a single wild ticker was helping or hurting you.
Exit targets
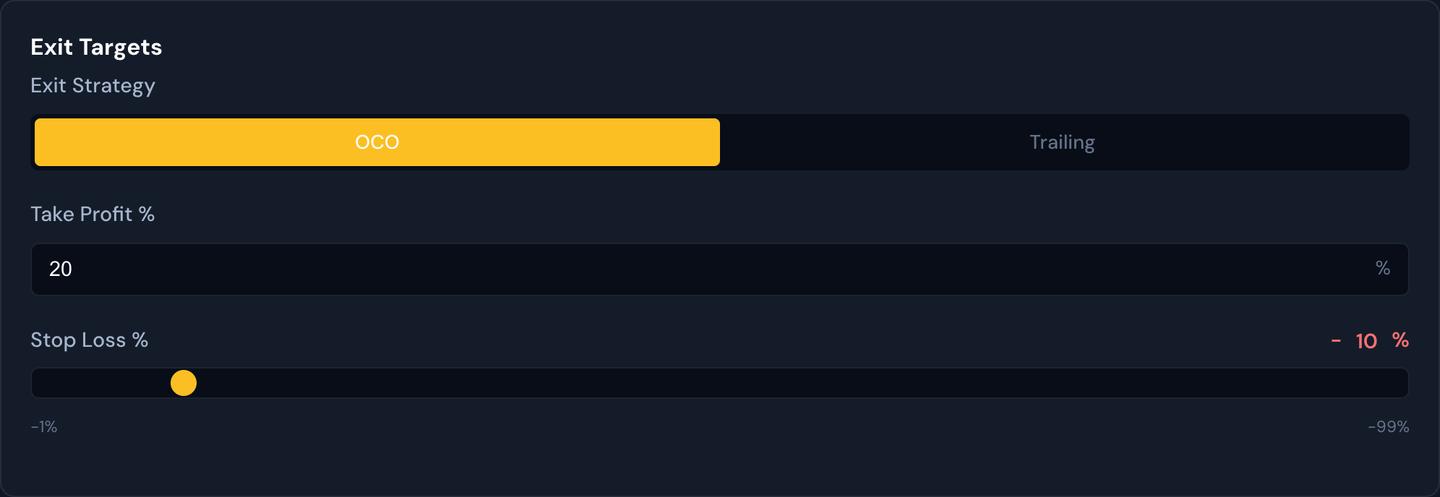
- Exit Strategy — OCO (a fixed take-profit and stop-loss) or Trailing (a stop that follows the price up).
- Take Profit % and Stop Loss % — your exit targets for OCO.
Choosing Trailing reveals the trailing controls (single-tier or multi-tier). Those work exactly like they do live — see Trailing Stop and Multi-Tier Trailing for the full picture, and Profit Target & Stop-Loss for how the basic OCO exits behave.
Example
Try OCO with a 30% take-profit and 30% stop-loss, run it, then switch to Trailing and run it again. The two results tell you whether locking in a fixed target beat letting winners run.
Multi-leg exits and Profit Lock
Turn on Multi-Leg Exits (under OCO) to test a runner-style trade: instead of one take-profit and one stop for the whole position, you split it into as many as four legs, each with its own take-profit, stop-loss, and share of the contracts. This is the same setup you build on the live Multi-Leg Exits screen, so a backtest here tells you how that exact configuration would have played out.
Each row is one leg. Set its TP % (how far up it sells), its SL % (how far down it stops), and its Alloc % (what slice of the position it gets). The allocations have to add up to 100% — the total turns red and the Run button is disabled until they do. The backtester divides your contracts across the legs exactly like the live bot: it guarantees at least one contract to each leg that can be funded, and if there aren't enough contracts to fund every leg it keeps the ones that take profit soonest.
Once you have two or more legs, the Profit Lock box appears. This is the same feature described in Profit Lock on the live side: the moment one leg's take-profit fills, the stops on your remaining legs are automatically pulled up so the trade can't turn back into a loss. It never moves a stop below your breakeven and never moves one down. Pick a Lock Mode and a Lock %:
- Half Delta (% of the move) — the new stop lands part-way along the paying move. At 50%, a leg that filled at $1.00 from an $0.80 entry pulls the other stops to the midpoint, $0.90.
- % Below Filled TP — the new stop sits a fixed percent under the filled target. At 10%, that same $1.00 fill pulls the stops to $0.90.
In the results, any leg that was stopped out on a raised stop shows a Profit Lock exit reason, and multi-leg trades get a small ×N tag in the trades table — hover it to see each leg's size, exit price, and whether its stop was ratcheted (🔒).
Example
Entry $0.80, two legs with targets at +25% ($1.00) and +62.5% ($1.30), Half Delta at 50%. Run it once with Profit Lock off and once on. With it off, a pullback after the first target can still stop the second leg for a loss. With it on, the first fill lifts the second leg's stop to $0.90 — so even if the trade reverses, it ends green. The two runs show you exactly how much Profit Lock would have saved (or cost) over the tested period.
Alert quality filters
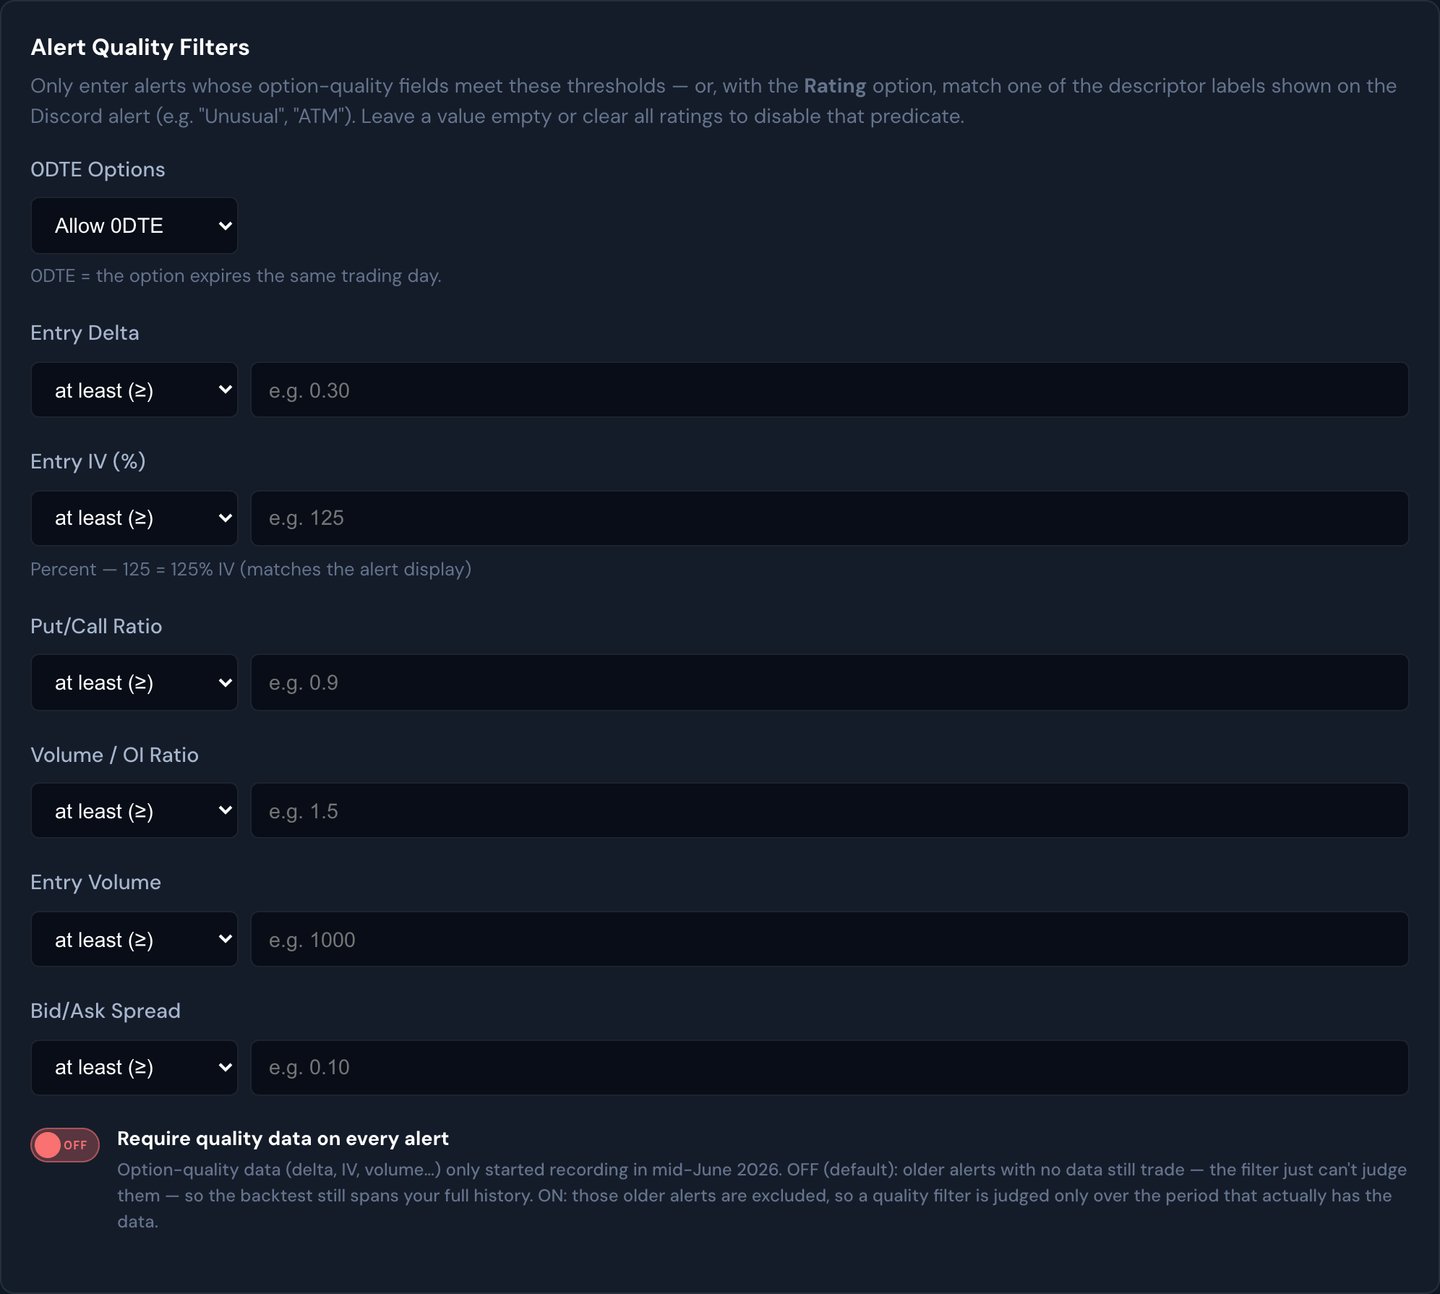
The backtest can screen alerts the same way the live Alert Quality Filters do on the Strategies page — by the option's delta, implied volatility (IV), put/call ratio, volume-to-open-interest ratio, raw volume, and bid/ask spread, plus the 0DTE (same-day-expiration) toggle. Fill in the ones you care about, leave the rest blank, and the backtest only enters the alerts that clear every bar — so you can measure whether a quality screen would have helped. The filters are available no matter which alert source you backtest.
Example
Curious whether sticking to liquid, near-the-money setups improves results? Set Entry Delta to the ATM rating, drop the Bid/Ask Spread ceiling to $0.10, and run it. Then compare the win rate and drawdown against the same backtest with the filters switched off.
A note on older alerts. The extra option-quality data (delta, IV, volume, and so on) only began recording in mid-June 2026, so alerts from before then don't carry it. The Require quality data on every alert switch decides what happens to those older alerts when a quality filter is on:
- Off (default) — older alerts with no quality data still trade; the filter simply can't judge them, so your backtest still covers your full history. Best when you want the longest possible track record and accept that the filter only really bites on recent alerts.
- On — older alerts with no quality data are excluded, so you get an honest read on how the quality filter performs, judged only over the recent period that actually has the data.
After a run, a short note under the results tells you how many alerts your filters excluded and how many had no quality data — so you always know how much of the window the filter could actually see.
Position tab
The Position tab controls how much money each simulated trade uses.
Account setup
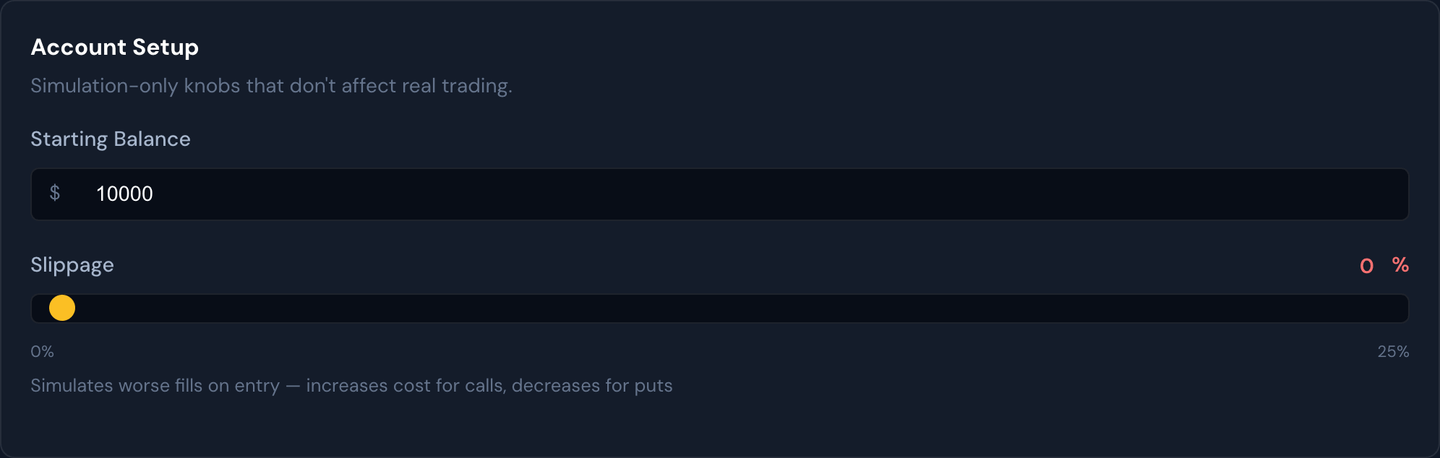
- Starting Balance — the imaginary account the backtest begins with. Every trade's profit and loss compounds on top of it.
- Cash Account / Margin Account — the same account-type switch you have live, so you can test how your real account behaves. On Cash, each dollar is used once per day. On Margin, a closed trade's cash and profit recycle immediately, so the same money can fund many trades in one day. This toggle starts on whatever your live account is set to. Full details — with an example — are in Cash vs Margin Account.
- Slippage % — a haircut applied to each entry fill so the simulation is a little more pessimistic (and realistic) than perfect prices.
Tip
Pair Margin Account with the No Daily Trade Limit switch (Trade Limits, below) to backtest a busy day where you take every single signal.
Position sizing
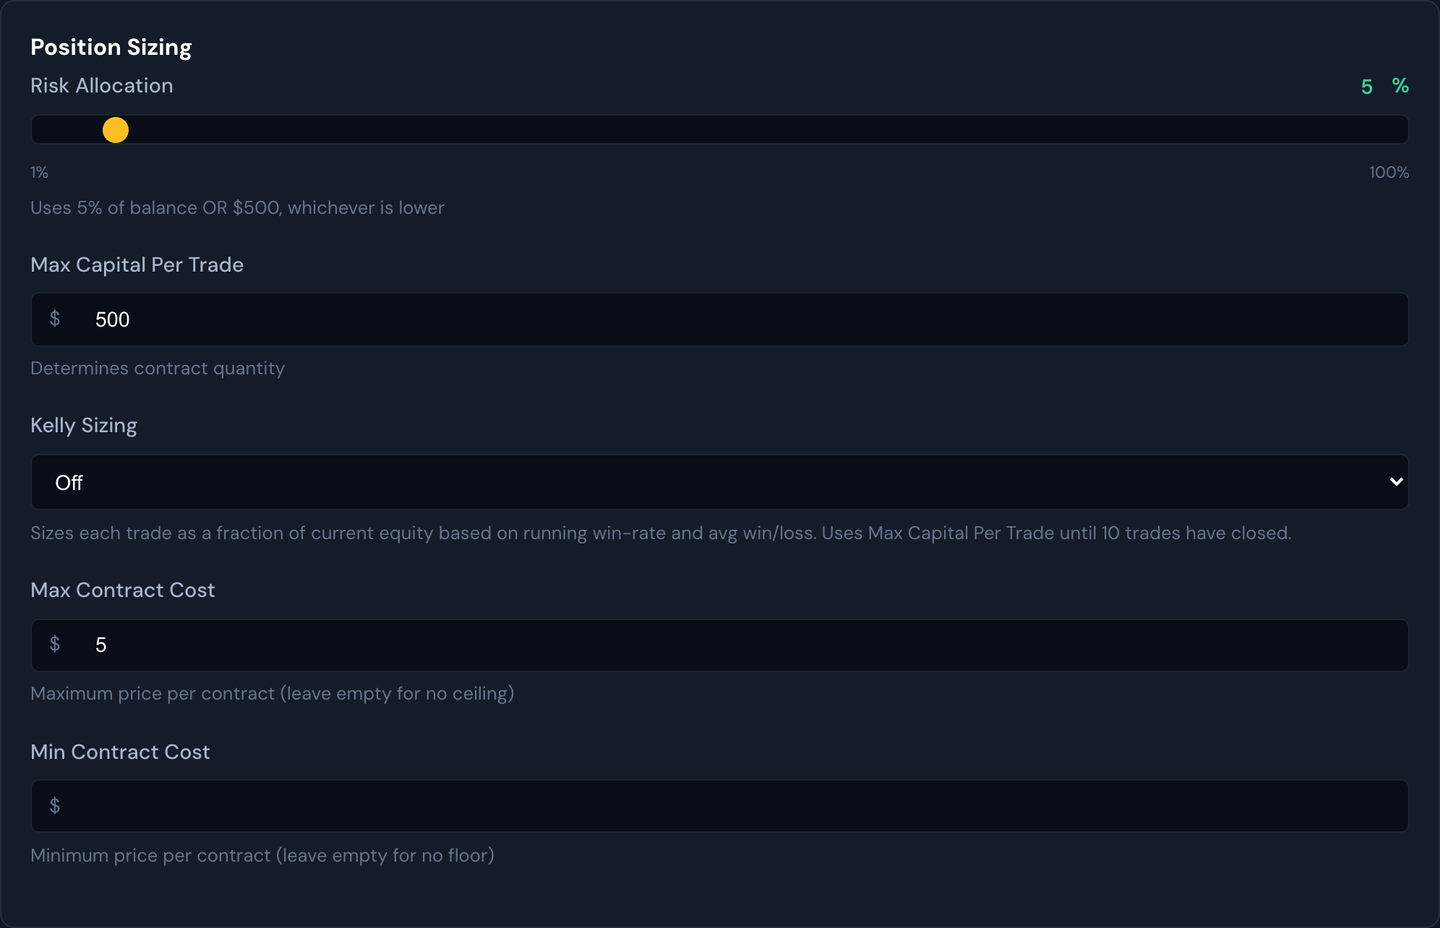
- Risk Allocation % — the share of the current balance to put toward each trade.
- Max Capital Per Trade — a hard dollar cap per trade.
These are the same two numbers your live strategy sizes on, so a backtest's contract counts match what the bot would really have bought. The full reasoning behind sizing lives in Capital Allocation.
Trade limits
- Max / Min Contract Cost — ignore alerts whose option is more expensive (or cheaper) than these bounds.
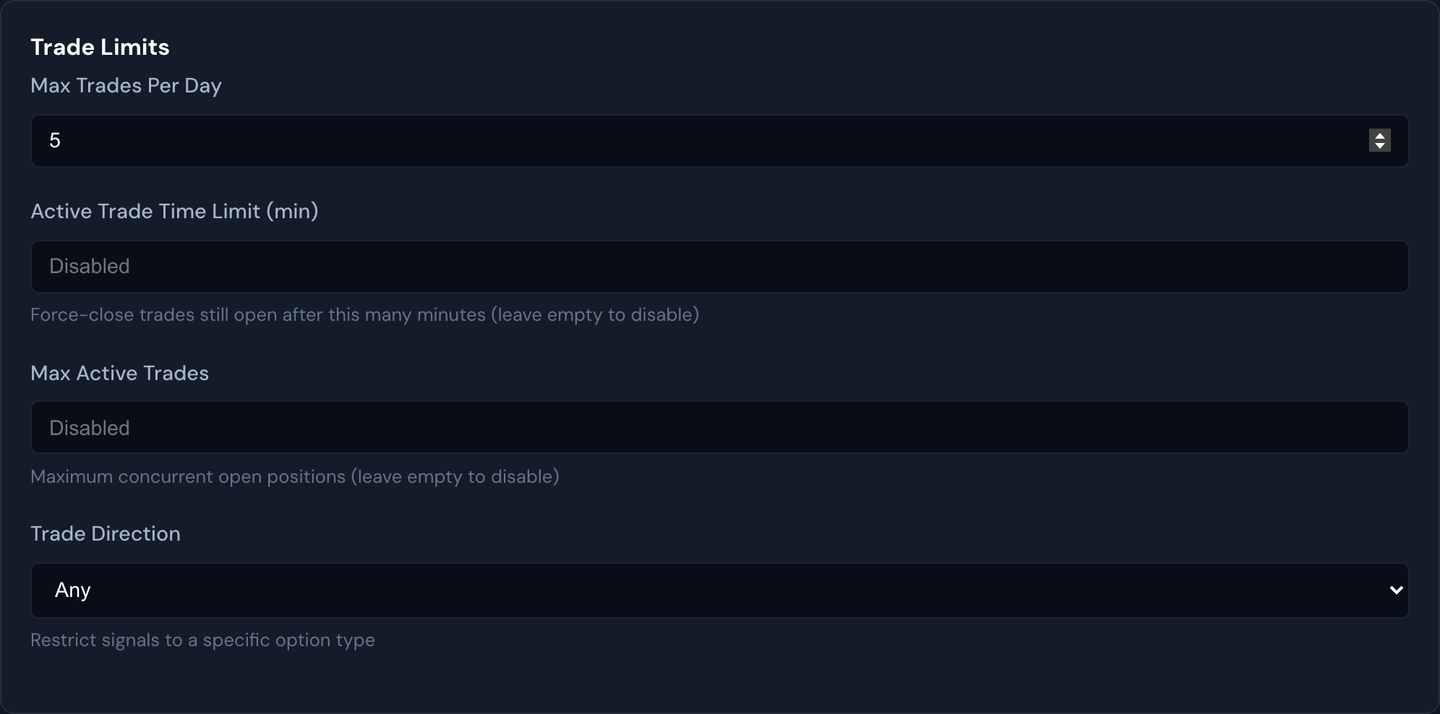
- Max Trades Per Day and Max Active Trades — cap how many positions open per day and at once. For the daily cap you can flip on No Daily Trade Limit (or set the number to 0) to take every eligible alert — most useful on a Margin Account, where capital recycles as trades close.
- Trade Direction — restrict to calls only, puts only, or allow both.
These mirror the live limits documented in Trade Limits.
Broker fees

Turn this on to subtract realistic TastyTrade fees (commission, clearing, exchange, regulatory) from the results, so the numbers reflect what you'd actually net. See Fees & Slippage.
Schedule tab
The Schedule tab controls when trades may open and which dates to test.
Trading hours
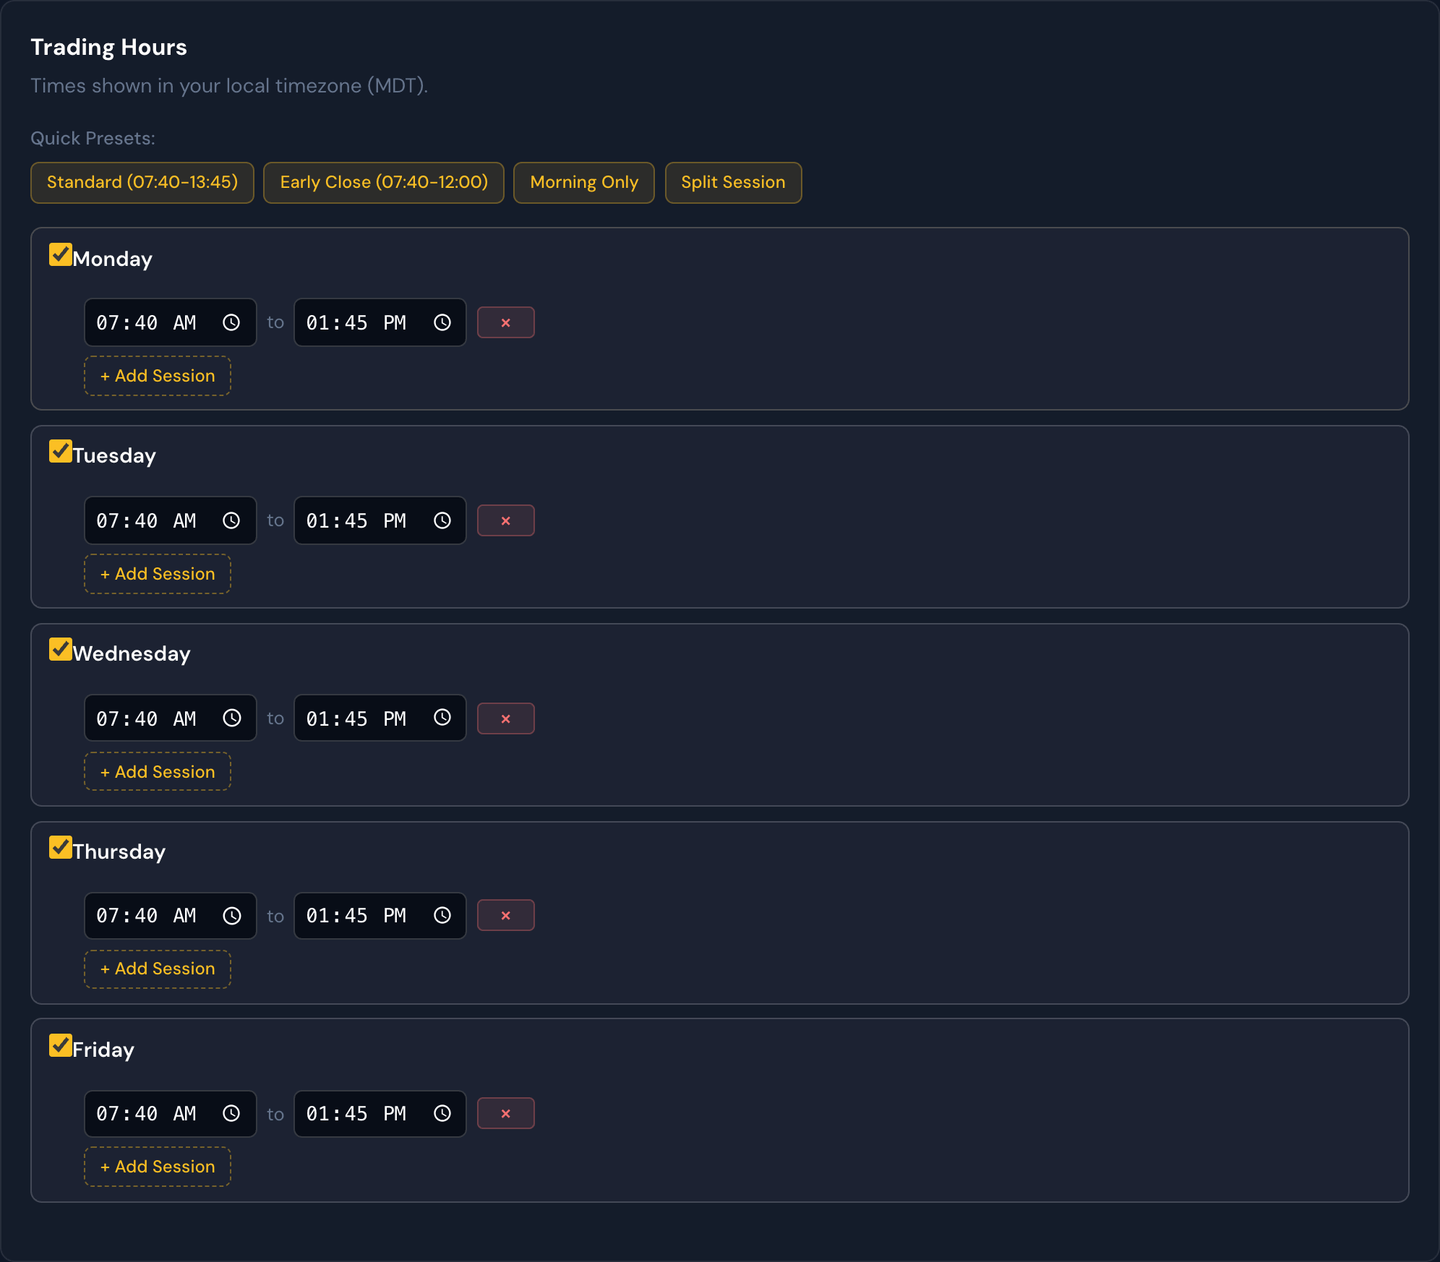
Set the time-of-day window (and per-weekday blocks) when the backtest is allowed to enter. Alerts outside the window are skipped. This is the same control as Trading Hours on a live strategy.
Backtest period
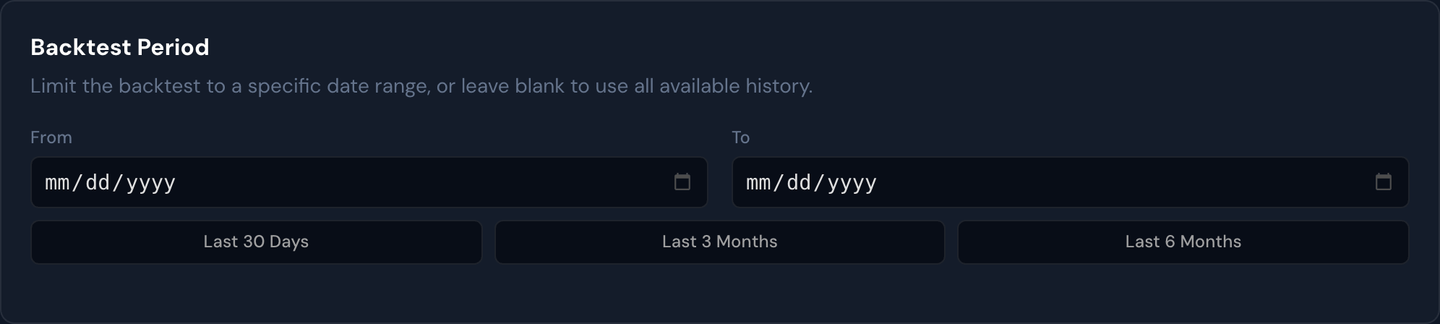
Pick the date range to replay, or use a quick button (last 30 days, 3 months, 6 months). This is unique to the backtest — it's how you choose how far back to look.
Example
Test the last 3 months first to see recent behavior, then widen to 6 months to confirm the setup wasn't just lucky in a single good stretch.
Market event skip days
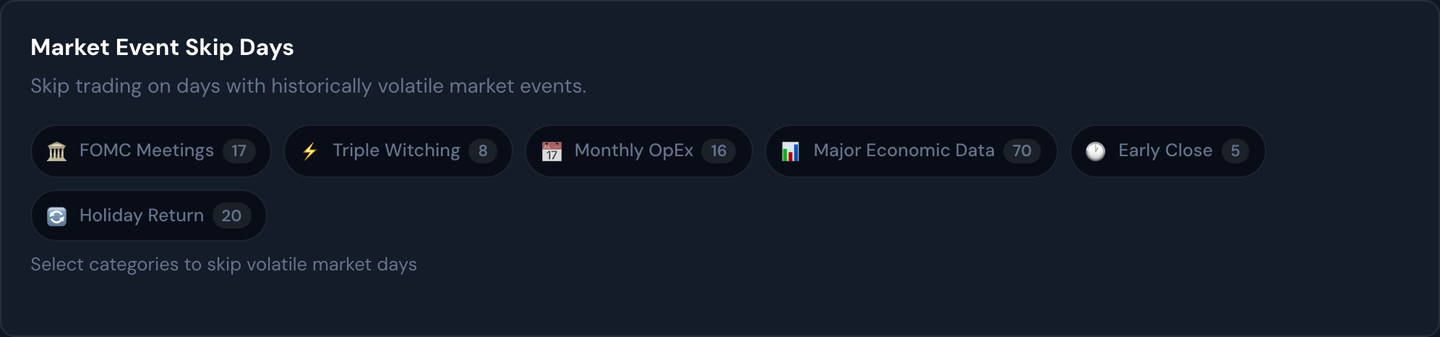
Tick event categories (like CPI or FOMC days) to make the backtest skip those dates entirely — the same idea as Skip Days on a live strategy, useful for measuring how much those volatile days helped or hurt.
Risk tab
The Risk tab adds circuit breakers that stop the day once a profit or loss threshold is hit.
Profit & loss killswitches
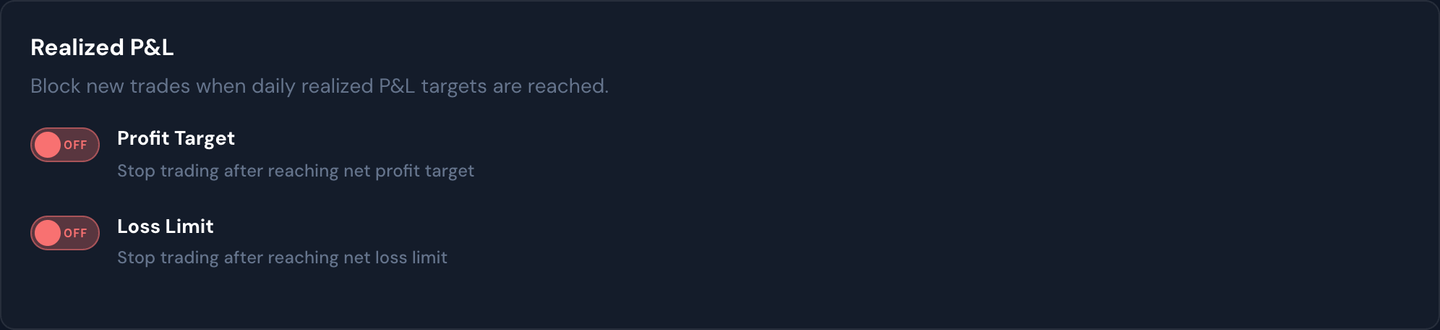
- Profit killswitch — stop opening trades once the day's realized profit reaches a dollar or percent target.
- Loss killswitch — stop for the day once the day's realized loss hits your limit.
These are the backtest version of the live Killswitch.
Unrealized P&L (beta)

A newer option that flattens all open positions when your combined realized and unrealized P&L crosses a threshold — modeling a "take the money and run" (or "cut the bleeding") moment intraday.
Running a backtest
Click Run Backtest and the page churns through every historical alert in the range, simulating exactly what your settings would have done. When it finishes, you get:
- Total profit / loss and win rate.
- Best and worst trade.
- Max drawdown.
- A trade-by-trade list you can scroll through to see why each one was a win or a loss.
Split tests
You can configure up to three sets of settings side-by-side and compare them on the same alerts. This is the cleanest way to ask, "Is a tighter stop better, or a wider one?" — same alerts, different settings, side-by-side results.
Example
Variant A with a 30% stop-loss, Variant B with a 40% stop-loss, Variant C with a trailing stop. Run once, read the three columns, and the numbers tell you which setup would have done best over the past month.
How closely the backtest matches your bot
The point of a backtest is that you could actually reproduce it live, so the simulation follows the same rules your strategy does:
- Every limit you set is enforced. Max Trades Per Day, Max Active Trades, and Max Loss Count all apply during the run — the backtest won't hold ten positions at once if your strategy only allows two.
- Averaging blends into one position. A repeat alert on a contract the backtest is already holding folds into that position at a weighted-average entry, exactly like the live bot, rather than being counted as a second trade. (Switch Allow Averaging off to skip repeat alerts instead.)
- Trading hours are Eastern time. Your window and per-weekday blocks are matched against each alert's ET timestamp, the same clock the live bot gates on.
- Swings close at 3:55 PM ET. With Close Swings at End of Day on, open non-0DTE positions are closed five minutes before the bell — the same moment the live bot sweeps them.
A few things deliberately don't carry over:
- Reverse is a button you press on a live trade, so there's nothing for a backtest to simulate.
- Futures strategies aren't backtestable — the historical data behind the backtester is option prices only, so futures sources don't appear in the Alert Source list at all. See Futures Strategies (Tradovate).
Note
Kelly Sizing used to live on the Position tab and has been removed. The live bot has no Kelly equivalent, so a Kelly-sized backtest could never be reproduced on real alerts. Old presets and share codes that mention it still load — they just size on Max Capital Per Trade like everything else.
Applying a backtest to your bot
When you find a configuration you're happy with, the Apply to Bot Settings button (Presets tab) copies those settings directly into your live trading rules so the bot uses the same numbers on real alerts going forward.
What Apply changes:
- The profit target, stop-loss, and (if used) trailing-stop settings on the strategy.
- The killswitches and any trading-hour limits you tested.
- The daily trade limit and any filters you toggled (including the alert quality filters).
What Apply does not change:
- Trades that are already open — they keep the bracket they were opened with.
- The strategy's signal source — Apply tunes the rules, not where the trades come from.
- Anything outside the strategy you applied to, including other strategies on the same account.
Tip
After applying a backtest to a live strategy, give it a few trades before declaring victory. Backtests are a strong starting point, but live markets always surface edge cases the historical data didn't.
Tip
A backtest is a model, not a guarantee. Markets change. Use backtests to eliminate obviously bad setups, not to "find the perfect one" — a setup that only wins on one specific past stretch usually isn't a setup at all.